Curren¢y Magic
Module for Miva Merchant
It's not easy being green. ― Kermit the Frog

Copyright
© 2006, 2007, 2008, 2010, 2011, 2013, 2014, 2015, 2017, 2018,
2019, 2020, 2021,2022
by Magic
Metal Productions
This document gives instructions on installing and using this module for Miva Merchant shopping-cart systems. If you need additional details, check with your Miva or hosting representative or documentation. You can also request help by email to support@TheMagicM.com.
This document applies to Curren¢y Magic version 3.00 and higher for Miva Merchant version 10.
 Curren¢y Magic allows your store to display prices in multiple currencies. Customers to your site can simply pick the desired currency from a menu, and your entire Miva store will instantly start displaying all prices in that form!
Exchange rates can be entered manually, or retrieved automatically from an on-line server.
You can create a free sccount at OpenExchangeRates.org, and set Curren¢y Magic to use that service to obtain exchange rates for various currencies. You can also configure the module to retrieve exchange rates public Web pages.
Flexible formatting includes international punctuation selectable for each currency, and customized display of negative numbers.
Advanced HTML and CSS formatting can be used, with plain text provided for emails and other unformatted displays.
The procedure for installing this module is the usual one for Miva Merchant modules:
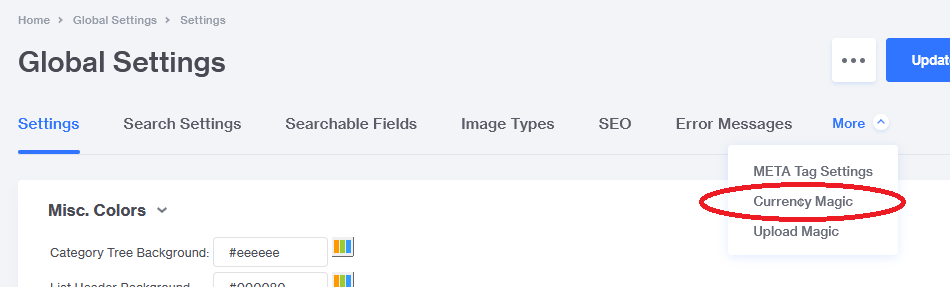
After the module is assigned to the store, a new "tab" link, labeled
Curren¢yMagic,
will be found on the User Interface > Global Settings admin page.
(You may need to pull down the More menu to find it.)
Clicking this link will take you to the module's settings screen.
Note: Editing the pages is mostly done by more advanced users; you may prefer to have a developer or hoster assist you with this. If you do want to edit your own pages, the following points will be helpful.
There are two ways to add the currency menu to your store pages.
The module provides a template Item named currencymagic. You must assign the Item to any page on which you want to use it.
After the Item is assigned to a page, you can add the currency menu to the page by inserting the currency-menu tag in the page template:
<mvt:item name="currencymagic" />
The format of the menu -- the actual HTML code -- is controlled by Module settings, specifically, the text boxes labeled HTML for currency menu and HTML for menu button.
Instead of using the built-in menu, you may wish to custom-code your own menu, radio buttons, or other input elements. For that purpose, the module provides l.settings variables that you can use on any page template. Note that the currencymagic Item must be assigned to the page; and the <form> element must have the name CMAG_Currency.
The template variable currencymagic:currencies will contain an array of data about all the currencies you have defined on the module's admin page, as long as they are enabled for display (the "Show" checkbox is checked). The following table lists the types of data, and the variable names, that are available for each currency.
| Variable name | Entity | Meaning |
|---|---|---|
| l.settings:currency:code | &mvt:currency:code; | Three-letter code |
| l.settings:currency:name | &mvt:currency:name; | Name or descriptione |
| l.settings:currency:prefix | &mvt:currency:prefix; | Characters displayed before the price |
| l.settings:currency:suffix | &mvt:currency:suffix; | Characters displayed after the price |
| l.settings:currency:decchr | &mvt:currency:decchr; | Decimal-point symbol |
| l.settings:currency:spacer | &mvt:currency:spacer; | Digit separator in long numbers |
| l.settings:currency:rate | &mvt:currency:rate; | Exchange rate |
Here is an example of some template code to generate a set of radio buttons for currency selection.
The enclosing mvt:if element ensures that your store will only display the buttons on pages where the currencymagic Item has been assigned.
This code will produce a display similar to this:
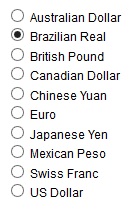
You can write additional mvt:item elements in your page templates to apply currency formatting to other prices that you may want to display. Specifically:
Curren¢y Magic takes control of the places on Miva store pages where currencies are displayed: prices, shipping charges, discounts, etc. It changes the numbers, and the way they are formatted, based on the currency selection made by the customer. Note that Curren¢y Magic does NOT change the actual prices and other data in your store. It just changes the way they are displayed. In the Miva admin pages, when you view orders in Order Processing, or edit your prices, shipping costs, etc., you will see the actual numbers that are stored in your databases.
Customers can change the display to their desired currency by simply making a selection on a drop-down menu. Admin settings and tokens allow you to put the currency menu in various places on any or all of your store pages.
The module's admin page includes a table where you can enter information on various currencies, including the exchange rate from your home currency. You can enter the exchange rates yourself, or you can set the module to obtain rates by contacting a rate server: a Web site that distributes the data on-line. The module has admin settings that control how it retrieves rates; you can set it to obtain rate data from many different servers.
The module keeps track of the last date and time when each currency's rate was updated. Admin settings allow you to specify how long to wait before retrieving a new rate. For most users, updating every day, or even every week, is sufficient. You can select more frequent updates if you want, but there will be some processing overhead that may cause slight delays for your customers.
Besides monitoring exchange rates, Curren¢y Magic also gives you control of how prices are displayed. You can apply HTML formatting to change the color, size, or other aspects of the appearance. You can customize how negative numbers are displayed. You can select different currency symbols and other punctuation for each currency.
A Miva store sometimes displays numbers in plain text, instead of HTML. Examples of this are the emails to customer and merchant, the costs displayed in the drop-down menu for selecting shipping, and various displays on the admin pages. Curren¢y Magic provides plain-text formatting for these. Plain-text formatting uses the currency symbols and other punctuation that is defined for each currency, but removes HTML formatting that you may have set up for use on your store pages.
To view to the module's settings screen, pull down the main menu in Miva admin, and click "User interface." Then click the Curren¢y Magic link; you may need to pull down the "..." menu to see it.
The screen has three sections:
Main settings and controls.
Settings for controlling on-line updates of exchange rates.
Settings for currencies that your store supports.
The various settings in each section are described below.
This part of the screen displays settings that control the operation of the module and the appearance of various page elements.
Select your own currency, the one that you use for your business operations. This should be the currency that was used to enter all the data in the Miva databases, such as prices, shipping costs, etc. If your currency is not listed, you will need to add it to the currency table (see "Currency settings" below). The store internal currency is highlighted in gold in the currency table.
Select the default currency for displaying prices to customers. This is usually the same as the internal currency, but not necessarily, e.g., if you have a U.S. business that sells mainly to customers in another country. The store will use this currency for new customers, or returning customers whose session has expired. Customers can override the default by making a selection on the currency menu. The module will remember the selection as long as the customer's session remains active.
These two text boxes let you enter text or HTML tags that are used to enclose all prices that the module displays. For example, you can put a <font> tag in the Before box, and a </font> tag in the After box, to change the color, size, typeface, etc.
Tip: Although sans-serif fonts such as Arial or Helvetica are generally easier to read on computer screens, a serif font such as Times may look a little more elegant or professional. Also, making the prices a little larger than surrounding text can make them more readable.
Tip: Instead of using formatting tags such as <font>, you may be able to use tags with class attributes, and apply the actual formatting with CSS style sheets. This would allow currency displays to have a different appearance on various pages, instead of being the same throughout the store.
NOTE: This formatting is not applied to plain-text prices such as those in the emails to the customer and merchant.
 Formatting
for negative numbers
Formatting
for negative numbers
Businesses use many different ways to display negative numbers, such as:
A minus sign before the number.
The letters "CR" (for credit) after the number.
Enclosing the number in parentheses.
Displaying the number in red, or some other color.
Curren¢y Magic can do any of these, and more. The Before and After text boxes allow you to enter text or HTML that will be placed around any prices that are negative. You can simply enter characters, such as a minus sign in the Before box, or opening and closing parentheses in both boxes. You can also enter HTML tags to change the color, or apply other formatting such as italics or underlining.
Some of the numbers displayed by the Miva store must be in plain-text form, not HTML; so Curren¢y Magic has two sets of text boxes for negative numbers. You can use one format in HTML pages, and another, simpler one in plain text.
Curren¢y Magic displays a drop-down menu and optional button that customers use to select their desired currency. You can customize the appearance of this menu by entering HTML, text, and one or two special tokens in this text box. At a minimum, the text box must contain the %menu% token, which represents the drop-down menu. You may also enter the %button% token to specify the location of a button to trigger the currency selection. If you do not use a button, the drop-down menu will automatically trigger a currency change whenever a customer makes a selection. You can also add other text such as a label or caption for the menu, enclose it with <table> or <div> tags to give it a colored border, etc.
If you have included a %button% token in the currency menu, you enter HTML code for your button in this text box. The button can be as simple as:
<input type="submit" value="Choose">
You can type some other label text instead of Choose. You can also use other types of buttons, such as images or hyperlinks with JavaScript.
If this box is checked, the module will display messages on store pages that show details of its internal operation. This is intended only for use by developers when testing the module. It should always be un-checked except when a developer needs to see the messages.
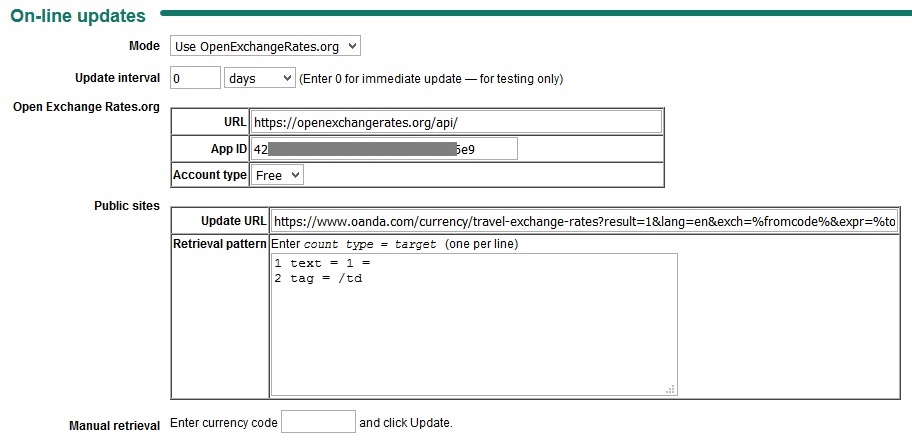
These settings control how the module communicates with rate servers to obtain exchange rates. The module can obtain rates in one of two ways:
This menu allows you to specify whether the module will retrieve exchange rates from OpenExchangeRates.org, or from some other public Web page or server. If you set this to Disabled, the currently saved rates will remain fixed, unless you change them manually (see below).
These settings let you select how often the module will check the rate server. You can enter a number of days, hours, or minutes. Too-frequent checking may slow down your own site's response time. Once a day, or even once every 7 days, is probably sufficient for most stores. If the financial markets become volatile, or if your business is especially sensitive to changes in rates, you could choose an interval measured in hours or even minutes.
NOTE: A setting of 0 in the text box will cause the module to check the exchange rates every time a customer views a page that includes the currency menu. This is intended only for testing. Normally, there's no need to update rates that often.
When adding a new currency to your store, you may want to immediately trigger retrieval of the current exchange rate. You can do that by entering the currency code in this text box, and then clicking the Update button at the bottom of the page. This can also be useful when testing a new retrieval pattern, or to check the module's operation after changing any settings.
The module displays a table listing a number of currencies, with their code, exchange rate, and other settings that control how they are displayed. The store internal currency is highlighted in gold. You can change any of these settings by entering new values in the table and clicking the Update button at the bottom of the page.
Upon installation, the module will support a number of common currencies. You can add more by entering the necessary information in the New Currency boxes at the bottom of the table, and clicking Update. The table is sorted in alphabetical order by description; so even though you add new currencies at the bottom of the table, once you click Update, they will move to their proper location.
NOTE: You can include HTML formatting in the text boxes described below, but it will not be removed when generating plain-text numbers. This may cause a problem in parts of your store that use plain text, such as the emails that your store sends, or the drop-down menu for shipping costs.
There is a standard set of codes (ISO 4217) to identify currencies. A complete list of codes can be obtained at various Web sites, including:
https://www.iban.com/currency-codes/
Tip: If you just want to look up a few codes, you can go to one of the public converter pages, such as http://www.oanda.com/currency/converter/, and simply scroll through the drop-down menu until you find the country you're looking for.
Enter a name or description for the currency, such as "Dutch Guilder" or "Zambian Kwacha." This will be used on the currency menu to identify the currency to customers.
You can place a currency symbol or other markers either before or after the number; various countries do it both ways.
Tip: Canada, Bermuda, and many other countries use the dollar sign prefix for their currency. You can use a suffix such as (CA) to distinguish each country.
Tip: You can put a space character at the end of the prefix, or the start of the suffix, to leave a bit of space between the price and the punctuation.
For long numbers, the module can enter a spacer character after every three digits. Not all countries use a comma for this; many use the period for this, and a few use other characters. Enter the desired character in this box.
Not all countries use a period as a decimal point; many use the comma. Enter the desired character in this box.
This text box shows the exchange rate for the currency, compared to your store's internal currency. For example, if your internal currency is US dollars, this text box will tell you how many of the other currency is equivalent to one dollar. If auto-updating is enabled for the currency, the box will be filled in automatically the next time a customer views a page with the currency menu. You can also trigger a manual update, or simply type in a number.
NOTE: if the rate is empty or zero, the currency will not be included on the currency menu for customers. If auto-updating is enabled, then whenever a customer views the currency menu, the module will try to retrieve new data for any currency that has a zero rate.
If this box is checked, the currency will be included on the currency menu for customers (unless the exchange rate is zero, as described above). You can uncheck this box in order to remove a currency from the store without deleting it from the table.
If this box is checked, the module will update the exchange rate by contacting the rate server as needed, based on the selected update interval.
The module remembers the latest time and date when the rate was updated, either by on-line retrieval or by someone manually entering a new number. This date is displayed in red if the rate has "expired," i.e., if it is due for a new update, based on the stored date/time and the update interval setting.
"Expired" rates are still used in the store; a currency is not removed from the menu simply because the rate has not been updated recently. Sometimes Internet glitches may interfere with on-line updates. If this happens, the module will try again the next time a customer views the currency menu. In the meantime, the module will use the old exchange rate.
To remove a currency from the store, check this box and click the Update button at the bottom of the page.
The module obtains on-line updates by sending a request to the update URL, which may be a public Web page that contains a lot of other text, images, advertising, etc., as well as the actual rate data that you want. The retrieval pattern tells the module how to sort through all the other text to find the rate. It's a set of instructions that tell the module to look for specific "clues" in the retrieved HTML, which eventually lead to the exchange rate.
Writing these patterns requires that you have some understanding of HTML. You need to be able to read the source of a Web page, and understand the arrangement of tags and text, in order to figure out a description for the point where the exchange-rate data is located. Creating patterns is mainly a task for developers and power users. This document gives enough information for skilled users to create their own patterns, or to modify the existing ones, in case of changes in the format of a rate-server page.
The pattern consists of one or more lines of text. Each line contains three elements: a count, a type, and a target. There must be a space after the count, and an equal sign after the type. Other spaces and tabs may be added for clarity.
Patterns can be explained with a simple example. Suppose you want to retrieve exchange rates from a Web site where the page consists of several HTML tables. After studying the layout, you find that the rate is contained in the 3rd column and 2nd row of a table, which is just below a subtitle that reads "Your exchange rate." The retrieval pattern for this would be:
1 text = Your exchange rate
1 tag  = table
2 tag  = tr
3 tag  = /td
The first line instructs the module to find the first occurrence of the text, "Your exchange rate." The second line tells the module to look further, until it finds a <table> tag. The third line says to proceed from there to the second occurrence of a <tr> tag (because of the number 2). This brings the module to the second row of the table. The fourth line says to search on for the third occurrence of a </td> tag.
When the search is completed, since the pattern ended with a tag step, the module retrieves the last piece of text that it read before finding the final search target. That's why the last line of the pattern specifies the </td> tag, instead of <td>. If the pattern ended with the third <td>, the desired text would not have been read yet.
Another way to retrieve an exchange rate is with a pattern that ends with a text instruction. In this case, you add the vertical-bar character "|" to the target. This character serves as a marker to identify the point in the text where the rate will be found. This is described in more detail in the next section.
Here are some other notes on creating patterns.
When processing a text instruction, the module removes white-space characters such as spaces and Newlines from the beginning and end of the retrieved text; so you don't have to put these characters in your patterns. (The module only removes white space from the beginning and end, not from inside the text.)
text instructions can only find their target if it matches all the text between two tags, except for white space characters as described above. For example, if a Web page includes the phrase "your data," you can't just search for the word "data." Also, text instructions can not find a piece of text with any HTML tags inside it; for example, you may not write a text instruction with a target such as Here's the <b>latest</b> data.
Many rate servers include the code or name of the currency on the page that displays the exchange rate. It's helpful to write patterns that search for this; but you can't just type the code or name into the pattern, because the same pattern is used for retrieving all currencies. The solution is to use a special token, which allows the pattern to find text that varies according to the currency being updated.
The token %fromcode% represents the currency code of your store internal currency, as defined in the table (see "Currency settings" above).
The token %fromdesc% represents the description of your store internal currency.
The token %tocode% represents the currency code of the currency being updated.
The token %todesc% represents the description of the currency being updated.
Also, the vertical-bar character "|" can be used as a marker to identify the point in the retrieved text where the rate will be found. Note that this marker is used only in text instructions.
For example, suppose there is a Web page that provides text that contains both currency codes, such as 1 USD = 90.09 JPY. You could use the pattern:
1 text = 1 %fromcode% =
1 text = | %tocode%
The second line of the pattern has a target that consists of a vertical-bar character, followed by a space and the token %tocode%. This tells the module to look for a piece of text that starts with the rate itself (represented by the vertical bar) followed by a space and the currency code.